This year I didn't compete in the Defcon Crack Me If You Can password cracking competition. It was my wife's first Defcon, so there was way too much stuff going on to sit around our hotel room slouched over a computer. But now that a week has passed and I'm back home, I figure the CMIYC Street Team Challenge would be a great use-case to talk about data science tools!
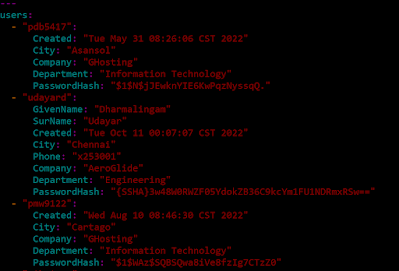
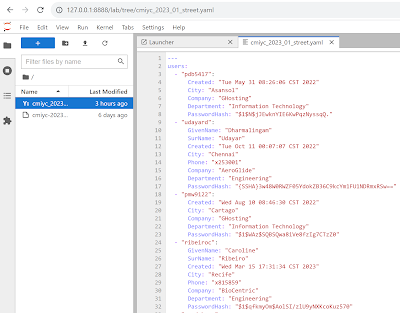
Looking at the file in a text editor, you can quickly see that at first glance it appears to be a yaml file.
Of course, you shouldn't trust anything that the contest organizers throw your way! Next up is to validate the yaml format and see if there is anything obviously wrong with it. A quick way to do that is using yamllint. To install and run yamllint:
Luckily you can easily tune any of the checks that yamllint performs. To hide these errors you can set the max line length to 130 and run yamllint again using the command:
This time, the file validated without any warnings. So it looks like the CMIYC challenge file is a valid YAML file. That doesn't mean that there isn't anything sneaky in it, but it makes data parsing a much easier task.
Next, let's quickly glance at the yaml contents. Opening up the file again, I see that it has 260424 lines. But each user entry has a variable number of fields associated with it. To get a quick idea of how many hashes I'm dealing with I used grep on PasswordHash. I then did a quick grep to see how many users there were by leveraging the fact that the YAML secondary categorty will start with a " - ".
Luckily the two numbers matched so that means there I'm looking to crack at least 29,847 password hashes. It also means that every user probably has one password hash associated with them.
So now we have the file, and looked around a bit, it seems like it's time to extract the hashes and crack some passwords! My default "Quick and Dirty" approach is to write a short awk script such as the following:
- cat cmiyc_2023_01_street.yaml | grep PasswordHash: | awk -F": " '{print "1:"substr($2,2, length($2)-2)}' > greped_password_hashes.txt
The problem with this approach is that it dumps all the hashes into the same file, doesn't separate them by type, and I lose all that user and metadata associated with them. The loss of metadata is a real problem since I suspect it will play a very important role in actually cracking hashes for this contest. I'd really like to have a better way to create hash-lists and manage cracking sessions! This leads us to the next section of this writeup!
Creating a JupyterLab Notebook:
JupyterLab notebooks are a way to organize and document all the random code you write while analyzing data. The name Jupyter stands for the programing/scripting languages it supports: [Julia, Python, R]. I think a better description of JupyterLab is that it's a stone soup. If you are on your own and doing a task only once, then it doesn't really add a whole lot. You're just drinking muddy water and it's a lot of extra pain to set it up and use it. The thing is, you are vary rarely on your own, and almost no task is done only once. Heck, I've probably only written one hello world program from scratch in my life. Every other program I've worked on since then I've copied off previous efforts. The documentation JupyterLab provides makes it easier to remember what you've done and build upon it for future efforts.
Long story short, I've never regretted starting a Jupyter Notebook. Somehow that soup is full of delicious ingredients at the end of the day!
Installing Jupyter is super easy. I primarily use Python (I really need to start moving into R), so all I need to do is install it via pip:
To run it locally you can start it up with the following command and then connect to it with a web-browser:
Wait! Web-browser?! Yup, it runs as a server-side application which makes it very easy for teams to collaborate using it. Enabling remote access requires a few more steps (such as configuring authentication) which I'll leave for you to Google yourself (the documentation to do this is not great). For this tutorial I'm going to stick with local access.
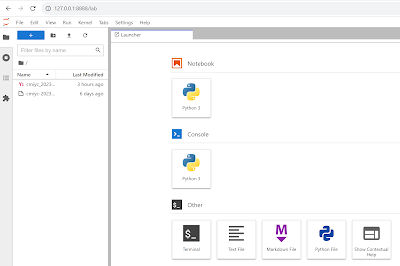
Starting up Jupyter in the directory for this challenge, initially it's pretty boring. It's just a stone sitting in the bottom of an empty cauldron. I can see the YAML file and open it up, but even then, by default Jupyter doesn't have a lot of built-in functionality to start carving it up.
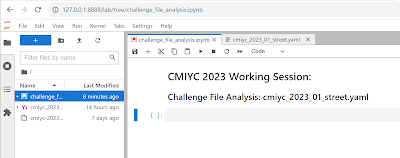
Things start getting a *little* more interesting when you go ahead and create a Notebook. A Notebook lets you combine Markdown blocks with code blocks that you can execute. Basically it's a wiki where rather than post code snippets you post programs that you can run and save their results.
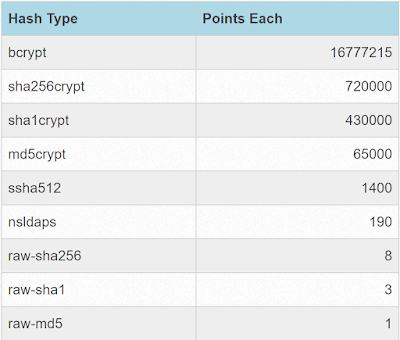
Ok, so that's great and all. It's a fancy wiki. But time is ticking and we still haven't extracted those password hashes and started cracking them yet! Let me get off my data-scientist high horse and say, by all means, take a moment to use a messy awk/grep script, create a hashlist, and start your systems running default rules against the faster hashes. But once those GPUs are cracking lets come back to this Jupyter Notebook. The first question that is useful to answer is what types of hashes do we need to crack? Now, for this competition the hash types are easy to figure out since KoreLogic posts them on their score-page:
The question is, how many hashes are of each type? One option is you can load them up in your cracker of choice and see which ones get processed. In fact, that's what I did initially, and it "works". But it's still nice to visually see the breakdown as well as understand how many points each category is worth. So let's write a quick Python script!
The first thing to do is load in the yaml file. Jupyter Notebooks are based around the concept of cells. Each cell can contain markdown or code, and can be executed independently but the results persist until they are re-run. I know this is confusing and I apologize, but let me try to explain this with an example. I'm going to make the scrip to load the Yaml file into Python its own cell. This is because this operation takes a bit (it's a big challenge file). This also brings up one of the huge advantages of using Jupyter and what makes it more than just a "fancy wiki with code". It's that variables are saved once a cell is run. This means I only need to load that data file up once, and I can then access it from code snippets in other cells as I advance my analysis of this file.
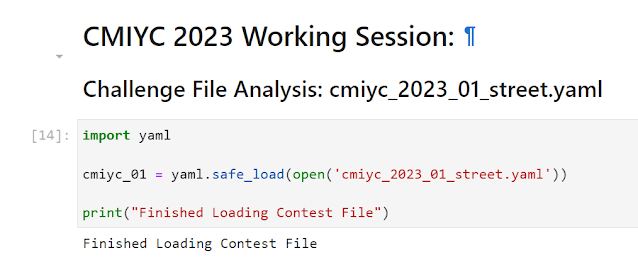
Cell layout, breaking up your code, running cells in the correct order. These are all issues you'll encounter as you use Jupyter Notebooks more often. But the key here is I don't want to write my entire analysis program at one time. I don't know what I'll encounter during this challenge. But Jupyter saves my execution environment so time intensive tasks like this only need to be run once (or until the underlying data changes). To demonstrate this, let's access that data and try to figure out the breakdown of hash types in a different cell.
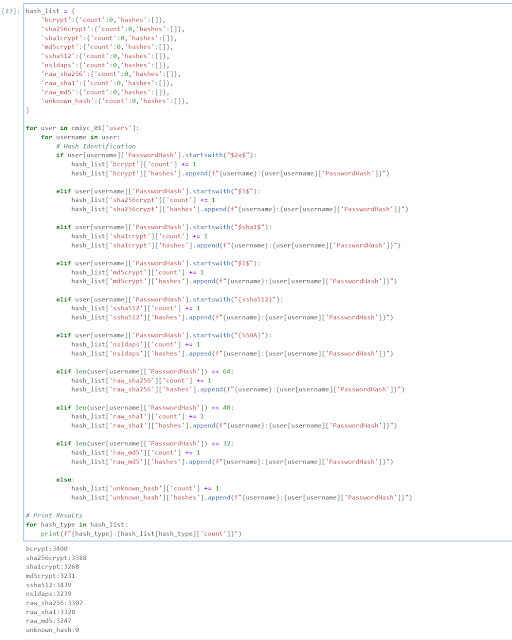
Now I have a count for each hash type, and I can see the hashes are fairly equally distributed. While the hash types are roughly equally distributed the total points per hash type are not. One bcrypt hash is worth roughly 16 million times more points than a raw_md5. This highlights the key to this contest is to find patterns by cracking fast hashes, but then focus on cracking the slower high-value hashes. Aka the fast hashes on their own are basically worthless from a point perspective, but cracking them can allow better targeting of high-value hashes.
Side note: The top street team (Hashmob Users) cracked 500 bcrypt hashes. Almost twice as much as the next nearest player/team. But only around 15% of the total possible bcrypts.
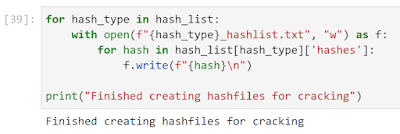
The next step is to make better hash_lists so we can actually start cracking effectively. As I mentioned earlier, I already parsed out the data so all I need to do is to create a new cell that saves the contents to disk.
At this point, I want to stress, it's really time to stop messing with this notebook and start focusing on cracking some hashes. Let's take a break and run some default cracking sessions against the raw hashes (md5, sha1, and sha256).
For the cracking sessions I simply ran the default John the Ripper attack (default dictionary, rules, and incremental mode) for a couple minutes each on my laptop. Aka:
- john --format=raw-sha256 raw_sha256_hashlist.txt
Unsurprisingly this was not very effective, cracking a total of 437 passwords across the three raw hash-types. This is where the CMIYC contest really starts. Next step usually is to start running more complicated attacks, look at the cracks to identify base words and mangling rules, and build upon that. And if I was really competing in this competition that's exactly what I'd do. But as those attacks are running let's go back to JupyterLab and see if we can optimize how we're analyzing those cracks.
To analyze the cracks we need to see which passwords we cracked. John the Ripper has a great option called "show" which allows you to give it a hash-list and it'll output all of the hashes it has cracked. Side note, if you run "show=left" it instead output all the hashes it *hasn't* cracked.
But wait, it looks like I forgot something when I created my hash-lists since JtR's show option does not work with my raw-MD5 and raw-SHA256 hashes....
The problem is in how I created those hash-lists since JtR's show option isn't that smart. It needs to be told explicitly what the hash-type is and those hashes are ambiguous. Now I could specify the hash-type on the command line, but for future analysis I want to look at cracked hashes across multiple hash-types so it's easier to recreate the hash-types with the proper hash designator, such as "$dynamic_0$" for raw-md5, included in them.
This is actually good since it provides a learning example on how you can update your code in jupyter (That's how I'm going to spin this oversight anyways ;p). First let's modify the parsing code to add the required fields to the hashes.
I then re-ran this cell, and after that, re-ran the cell that wrote the hashes to disk for cracking. Once I did this the john --show option worked great for the raw-md5 and raw-sha256 hash-types.
One key thing I want to highlight is you can re-run each cell independently of each other, so if you want to make a quick modification you can without having to run the whole notebook again. What you need to keep in mind though is all the variable are global so the order you run your cells in is very important. Aka running one cell can change the variables that other cells use. So this is a very powerful feature of Jupyter notebooks allowing you to quickly tweak your code. But it's also a very dangerous feature so you need to be a bit careful when using it. If at any point things get wonky you can instead re-run all your cells in the notebook from scratch to reset the global state of things. Ok, enough harping about that, but spoiler alert, I'm going to be tweaking my code a lot as things progress.
While I can perform analysis of the cracked passwords, what I'm really interested in how the metadata associated with each account matches up to the cracks. How about we do a quick analysis of the variation of the company and department metadata?
Looking at the company info ... it looks like the companies themselves are pretty random.
Two companies stand out though. Let's dig into this and look for companies that have over a hundred users:
So of all the companies, GHosting and Dandy might be ones to dig into more later.
Now let's do the same for departments:
Now this is something I can work with! Next step, let's see how our cracks break down by department. To do this, we need to import our cracks back into JupyterLab.
You'll notice in the second cell I also realized I needed a quick lookup based on username so I added that in as well. Now that we have the plains we can start printing out cracks based on Department.
There's more cracked passwords of course that I'm not showing since the picture would be too large, but the following password makes me feel personally attacked...
I kid as I know it wasn't intentional :) One thing that I should mention though is these lists can be easily updated as I crack more passwords. All I need to do is re-run these cells in the Notebook. Looking at the plains, you can start to see that certain mangling rules and dictionaries start to pop out as areas of future exploration.
Backing up though, there probably is some other metadata that I could use to further refine attacks on these lists. In Team Hashcat's excellent writeup (
available here) they talked about an enhancement to their team collaboration tools called "Metaf****r" that displayed all the metadata next to the plaintexts. Can we replicate this in JupyterLab? Absolutely!!
I'm going to end this post here as I think this starts to show the value of JupyterLab Notebooks. I know, I didn't really crack that many hashes! For my next post I'll leverage this Notebook to actually create wordlists + mangling rules to target hashes and start to show the real value of data analysis when performing password cracking attacks.






Comments